Setting Up an On-Site Check-in Form
Setting Up an On-Site Check-In Form
An on-site check-in form lets you collect a response from each attendee as they check in — before their badge prints and they enter the event. The form is displayed directly on the check-in kiosk, prompting the attendee to complete it before their check-in is confirmed.
This is useful in a range of scenarios:
- Terms and waivers. Collect agreement to liability waivers, photography consent, or event-specific policies at the point of entry.
- Last-minute data collection. Capture information that wasn’t collected during registration, or that may have changed — dietary preferences, session selections, or similar.
- Sponsor and partner surveys. Gather short survey responses for sponsors who want opt-in data or feedback collected at entry.
Only one check-in form can be connected per kiosk profile.
Note: This feature requires the OnSite Check-In Power-Up.
Contents
2. Assigning the form in your kiosk settings
3. Testing the form on a kiosk
1. Creating a Check-In Form
Check-in forms are built in the Event Dashboard using Custom Forms. Create the form first, then link it to on-site check-in in your kiosk settings (see Section 2).
- From the Event Dashboard, navigate to Advanced > Custom Forms.
- Above the Custom Forms table, select Create.
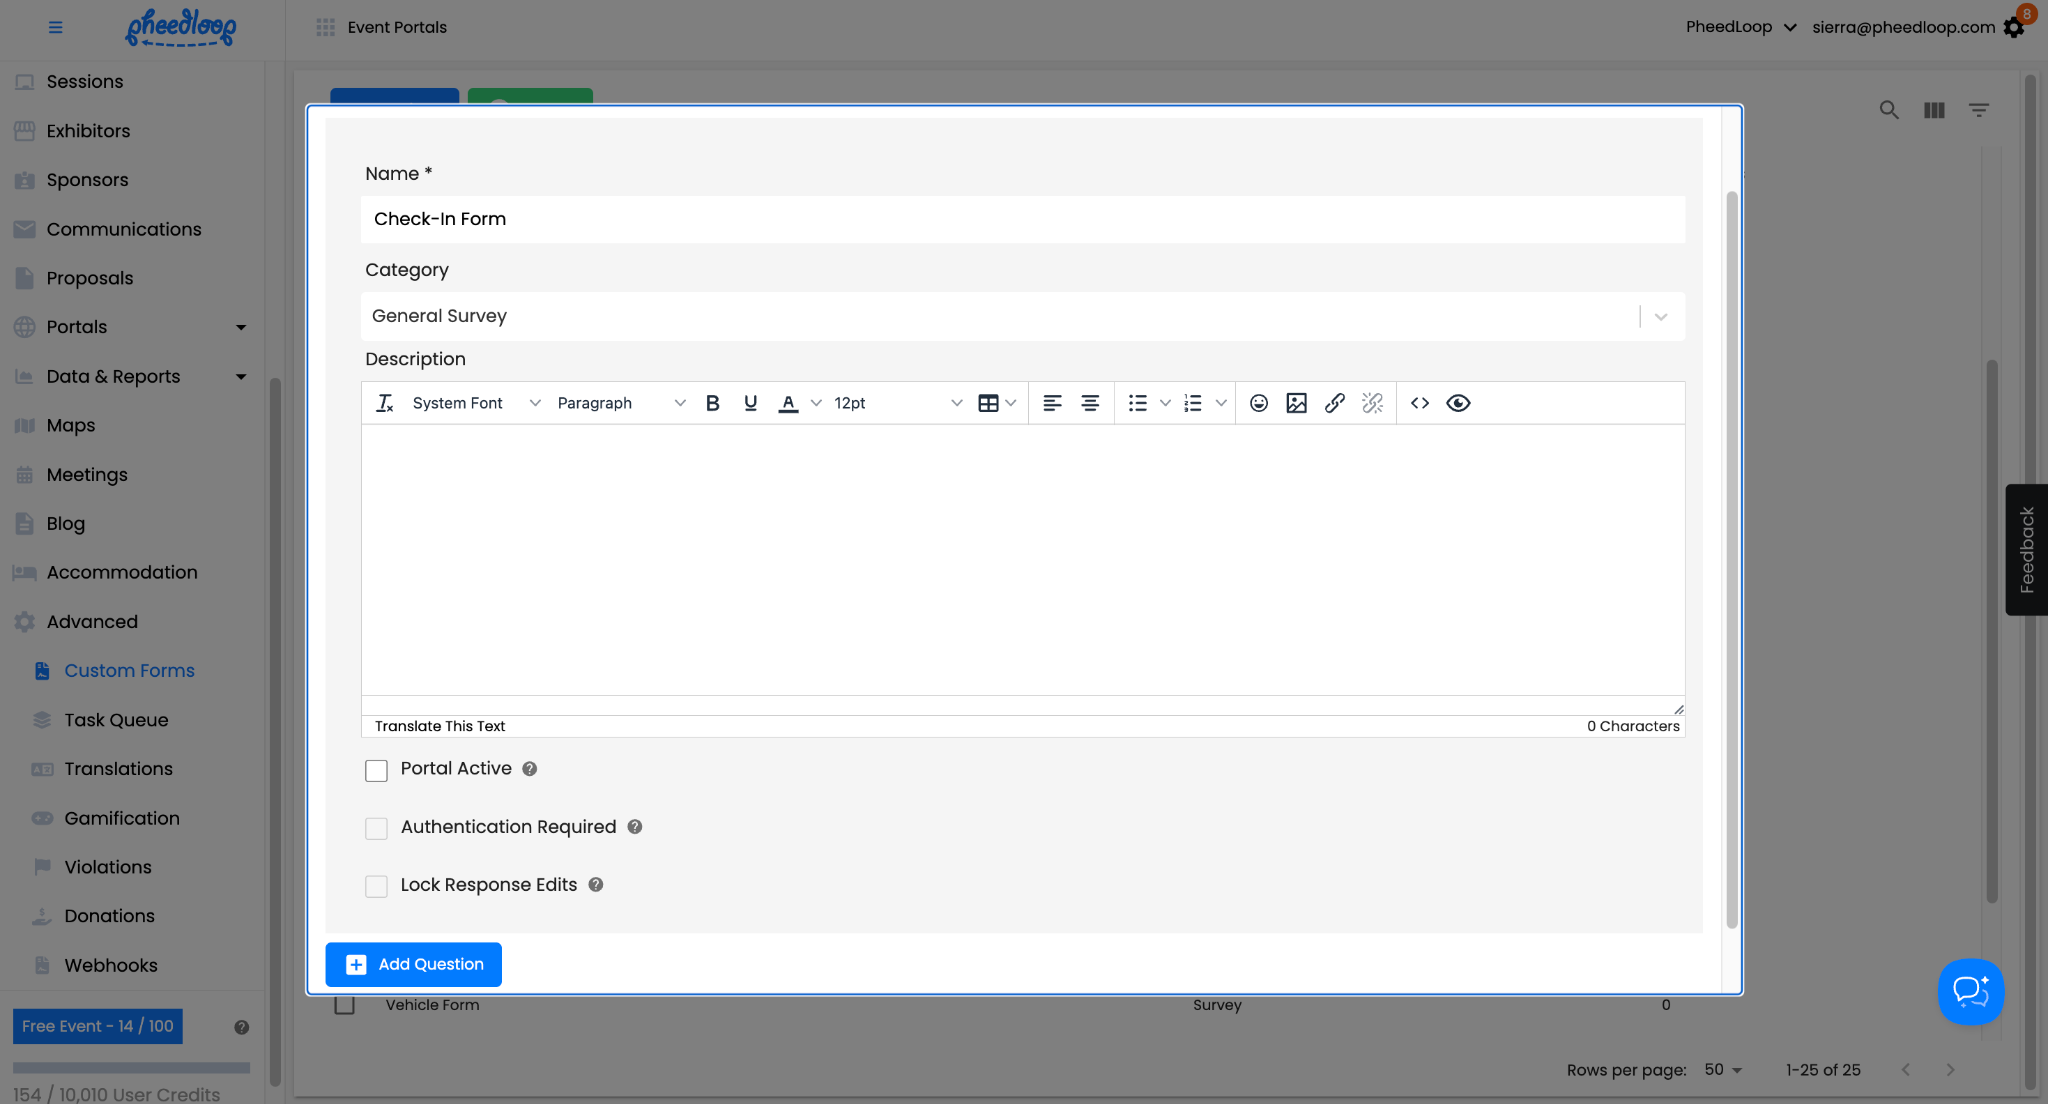
- Enter a name for your form. Under Category, select General Survey.
- Add your questions and any introductory description. See Using Different Question Types for Custom Forms for more information.
- Select Save Changes when done.
2. Assigning the Form in Your Kiosk Settings
- From the Event Dashboard, navigate to OnSite > Kiosk Profiles.
- Select the Kiosk Profile you want to apply the form to, or select Create to set up a new profile.
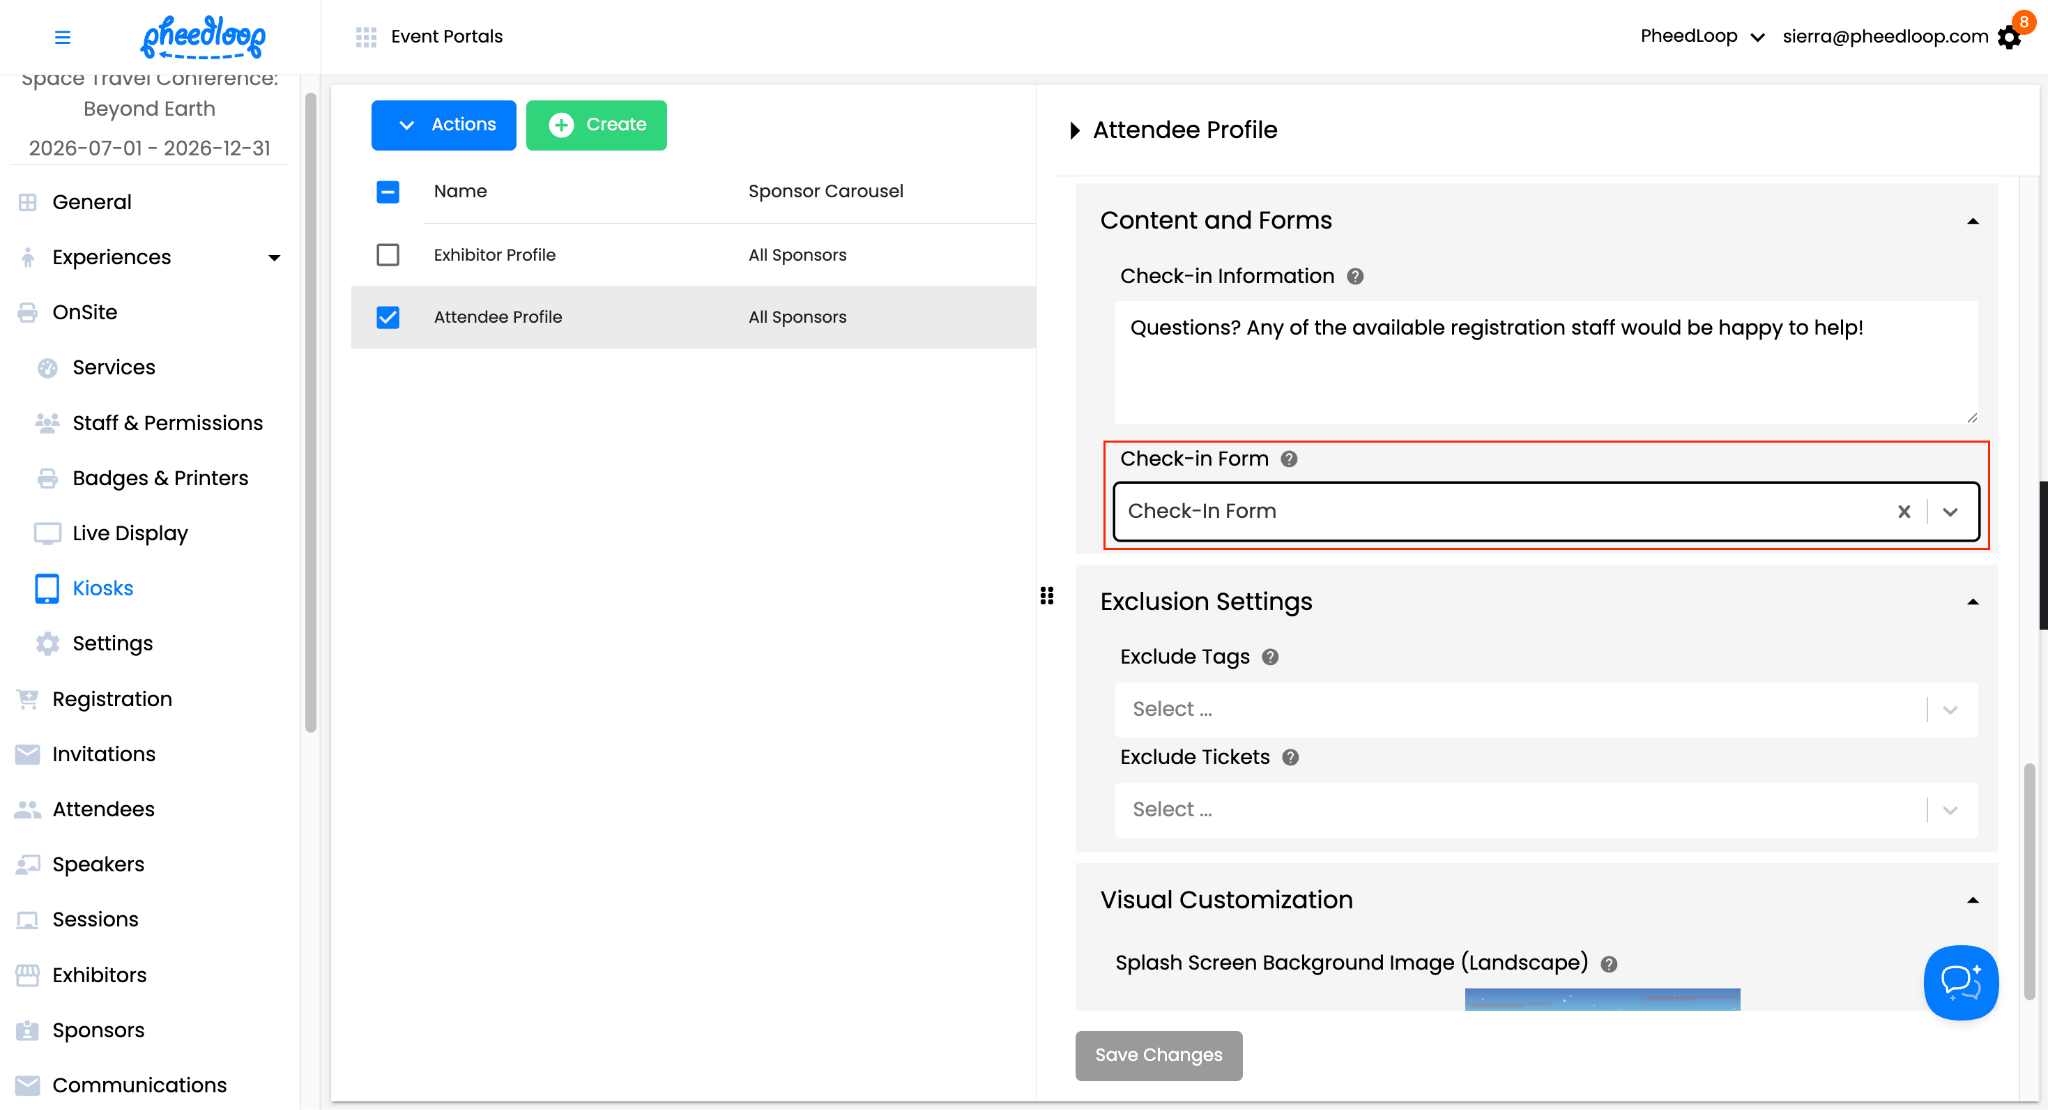
- Under Content & Forms, select the form you created under the Check-In Form dropdown.
- Select Save.
The form is now linked to this Kiosk Profile. Any iPad running this profile will display the form during check-in. If you use multiple Kiosk Profiles across different iPads, you will need to assign the form to each profile where you want it to appear.
For more information on configuring your kiosk experience, see Customizing Your Check-In Experience with Kiosk Profiles.
3. Testing the Form on a Kiosk
Test the form using the On Site Kiosk browser-based preview before your event opens. This lets you confirm the form appears correctly without needing physical hardware.
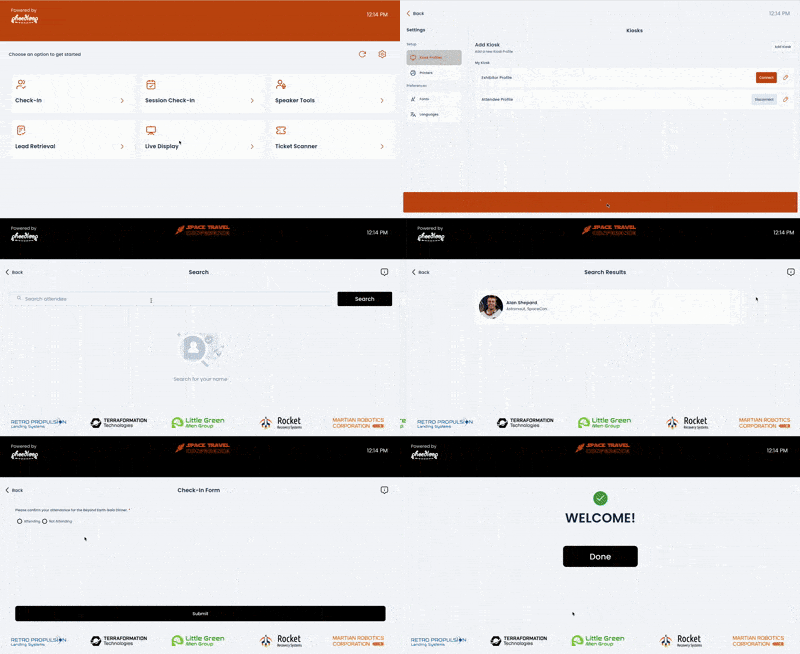
- From the Event Dashboard, navigate to Event Portals > On Site Kiosk.
- Enter your Event Code.
- Your Event Code is in the Event Dashboard under General > Details.
- Log in using your Team Member credentials.
- On the kiosk screen, select Check-In.
- Under Setup, select Kiosk Profiles.
- Under My Kiosk, select Connect next to the profile the Check-In Form was connected to.
- Select Enter Kiosk Mode at the bottom of the Setup screen.
- Select Search and look up a test attendee by name.
- Select the attendee’s name, then select Confirm Check-In.
- Confirm that the check-in form appears and that questions display correctly before check-in completes.
Pro Tip: Use a test attendee record (not a real registrant) when running through the form during setup. Form responses are recorded and will appear in your CSV export, so real attendee records may accumulate test data.
4. Downloading Form Responses
Once the event is underway or complete, you can export all check-in form responses as a CSV file from the Dashboard.
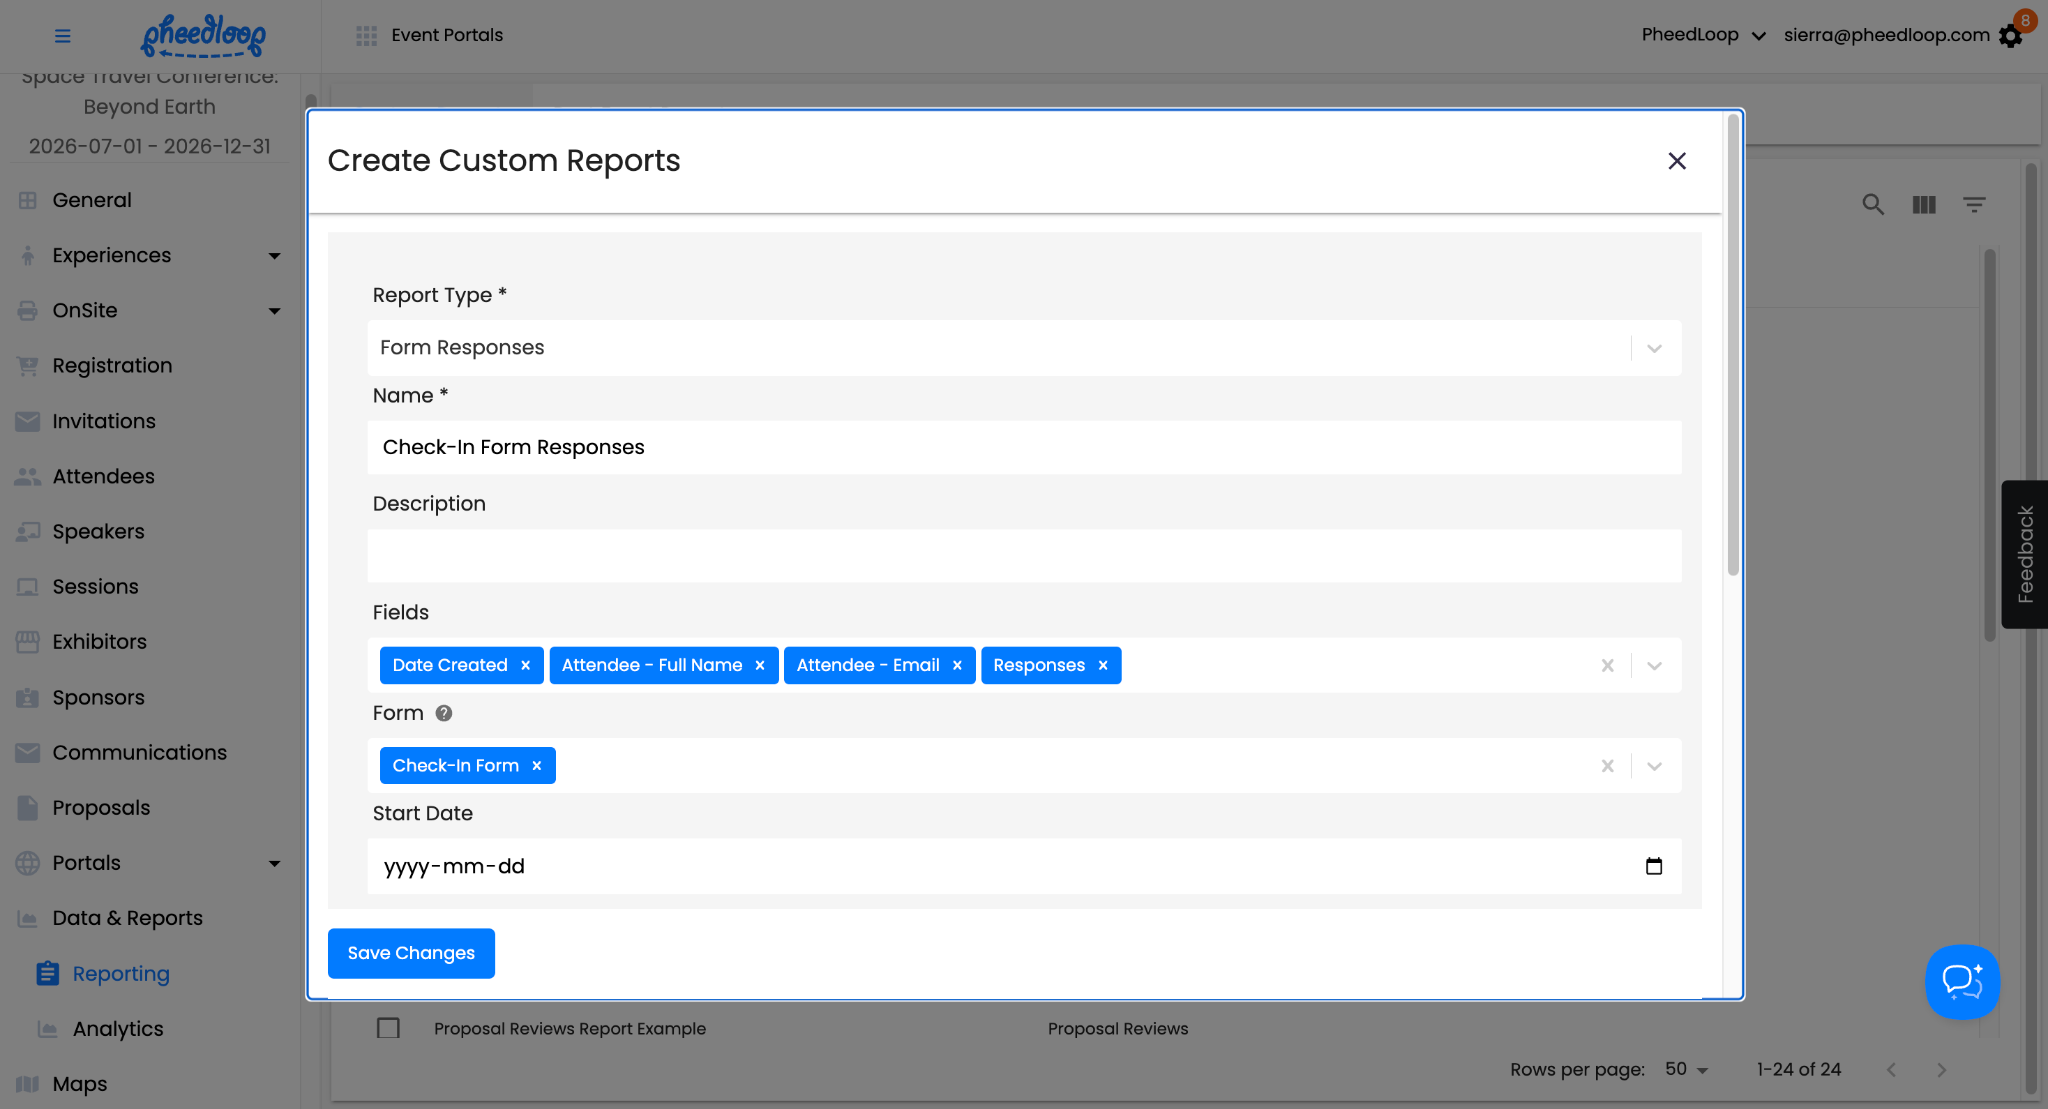
- From the Event Dashboard, navigate to Data & Reports > Reporting.
- Select Create.
- Select the Form Responses Report Type and enter a Name.
- Under Fields, select the Attendee - Full Name and Responses, at a minimum.
- Under Form, select your Check-In Form.
- Select Save Changes.
Now that your report is created, you will want to generate the report in order to download it.
- Select the checkbox of your newly created report
- Above the Custom Reports table, select Actions > Generate Report
- Select Download Previous Report
A CSV file of the report will now be downloaded on your device.
Quick Tips
- Form appears for every check-in. The form is shown to every attendee checking in on a kiosk with the assigned form — there is no way to show it selectively to specific attendee groups within a single kiosk profile.
- Kiosk Profiles are per-iPad. If you want the form on only some kiosks, assign it to specific Kiosk Profiles and leave it out of others.